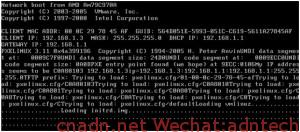
随着F5 V10版本的发布,安装方式出现了较大的变化,突然间没了像V9那样PXE安装,很多人都觉得不方便了. 随时总是携带一个USB DVDroom似乎不大现实,为每个版本做一个U盘代价也有点高,量产又不是总能成功. 幸运的是,尽管F5官方不再支持PXE安装,但是F5并没有将我们完全拒绝在PXE之外,本文教你如何通过一个虚拟系统同时实现V10所有版本的安装.
一、准备工作
在vmware等虚拟机中安装一个linux系统,例如centos,从网上下一个安装的ISO,带该5-6G左右,我安装的是centos 5,桥接接口到物理网卡。
系统要需安装dhcpd 服务,tftp服务,httpd服务,例如
dhcp-3.0.5-21.el5
httpd-2.2.3-31.el5.centos
tftp-server-0.49-2.el5.centos (ubuntu系统的默认tftp不行,改用dhcp-hpa,centos的就默认光盘带的即可)
dhcp服务提供F5启动时候获取IP用,tftp用于下载启动镜像,http服务用于实际安装时候的安装源地址
http、tftp服务保持启动后在后台运行,dhcp配好即可,后续的脚步会再用的时候主动去启动,免得干扰网络。
二、配置DHCP, tftp,http 等服务
/etc/dhcp.dconf配置:
| ddns-update-style interim;ignore client-updates;
subnet 192.168.1.0 netmask 255.255.255.0 { # --- default gateway # option routers 192.168.1.1; option subnet-mask 255.255.255.0; option nis-domain "domain.org"; option domain-name "domain.org"; # option domain-name-servers 192.168.1.1; option time-offset -18000; # Eastern Standard Time # option ntp-servers 192.168.1.1; # option netbios-name-servers 192.168.1.1; # --- Selects point-to-point node (default is hybrid). Don't change this unless # -- you understand Netbios very well # option netbios-node-type 2; range 192.168.1.2 192.168.1.3; next-server 192.168.1.1; filename "pxelinux.0"; default-lease-time 21600; max-lease-time 43200; # You can ignore below fix address release setting. host ltm3400-1 { next-server 192.168.1.1; hardware ethernet 00:24:e8:ed:46:66; fixed-address 192.168.1.2; filename "pxelinux.0"; } host ltm3400-2 { next-server 192.168.1.1; hardware ethernet 00:0c:29:78:45:af; fixed-address 192.168.1.3; filename "pxelinux.0"; } } |
另外,需要给这个虚拟机的网卡配置ip为192.168.1.1/24,手工启动dhcp看有无配置错误
/etc/init.d/dhcpd start
如果启动不起来可以用命令检查:
[root@localhost f5lab]# /etc/init.d/dhcpd configtest
Syntax: OK
/etc/xinetd.d/tftp 配置
| # default: off# description: The tftp server serves files using the trivial file transfer \
# protocol. The tftp protocol is often used to boot diskless \ # workstations, download configuration files to network-aware printers, \ # and to start the installation process for some operating systems. service tftp { socket_type = dgram protocol = udp wait = yes user = root server = /usr/sbin/in.tftpd server_args = -s /tftpboot -c disable = no per_source = 11 cps = 100 2 flags = IPv4 } |
确保tftp服务已启动:netstat –na | grep –i 69 ,如果没启动的话,用xinetd启动它:/etc/init.d/xinetd restart
Httpd服务没什么可配,启动即可。我们主要是借用一下http协议以便下载文件而已。但需要在网站根目录建立一个文件夹以便mount用,我的系统网站根目录是
[root@localhost xinetd.d]# cd /var/www/html/
所以在其下建立一个文件夹,名字叫 pxe10
mkdir pxe10
然后在/mnt 目录下也创建一个目录,名字叫iso10
mkdir /mnt/iso10
最后在home目录下创建一个目录f5lab,然后将v10.0.1, v10.1.0, v10.2.0等ISO文件拷贝到这个目录下
[root@localhost f5lab]# pwd
/home/f5lab
[root@localhost f5lab]# ll
total 2508712
-rw-r--r-- 1 f5lab f5lab 523837440 Dec 11 03:44 BIGIP-10.0.1.283.0.iso
-rw-r--r-- 1 f5lab f5lab 780675072 Dec 11 03:47 BIGIP-10.1.0.3341.0.iso
-rw-r--r-- 1 f5lab f5lab 819111936 Dec 11 03:47 bigip_10.2.iso
-rw-r--r-- 1 f5lab f5lab 142143488 Dec 11 03:47 Hotfix-BIGIP-10.1.0-3372.0-HF1.iso
-rw-r--r-- 1 f5lab f5lab 146835456 Dec 11 03:46 Hotfix-BIGIP-10.2.0-1755.1-HF1.iso
-rw-r--r-- 1 f5lab f5lab 153767936 Dec 11 03:46 Hotfix-BIGIP-10.2.0-1789.0-HF2.iso
三、写一个脚本
(脚本下载)
[wpdm_file id=12]
将这个文件放到/usr/bin下,设置权限
cd /usr/bin
chmod 755 pxeinstall.sh
(脚本里的文件名需要改为你的实际F5安装ISO文件名)
四、正式使用
正式用的时候,启动虚拟机,确保网卡已桥接,然后运行 pxeinstall.sh 脚本
| [root@localhost f5lab]# pxeinstall.shPlease input which version will be installed.
0 for 10.0.1 ; 1 for 10.1.0 ; 2 for 10.2.0 ; 3 for 10.2.1(Not ready): |
脚本提示选择要安装的版本,例如选2 安装10.2,得到如下提示:
| ==========================================You are installing 10.2.0.This scirpt can run more than one time.
========================================== >>>Will start dhcp server.... >>>DHCP server start successfully! ========================================== Please use below install source when running image2disk command http://192.168.1.1/pxe10/iso10/ Finished PXE setting! ========================================== |
好了,连接F5管理接口到你笔记本的接口,然后加电F5,开始安装:


文章评论